
Installing a toilet seat is a straightforward home improvement task that anyone can tackle with a few basic tools and a bit of know-how. Whether you’re replacing an old seat or upgrading to a new one, follow this step-by-step guide to ensure a successful installation.
Step 1: Gather Your Tools and Materials
Before diving into the installation process, make sure you have all the necessary tools and materials. You’ll need a new toilet seat, an adjustable wrench, a screwdriver, measuring tape, and pliers (optional). Ensure that the replacement seat matches the dimensions of your toilet bowl.
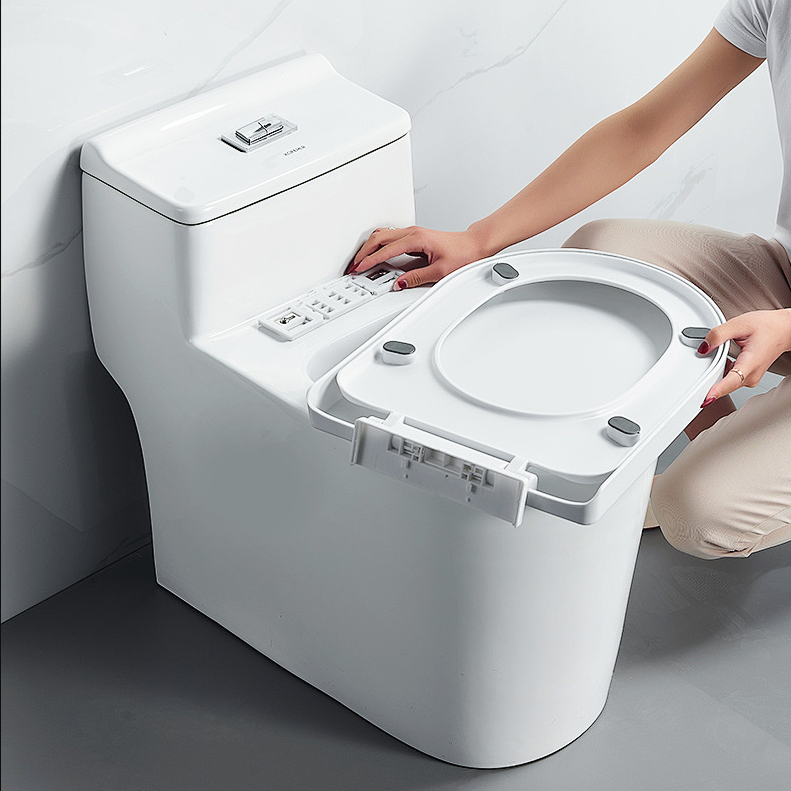
Step 2: Remove the Old Toilet Seat
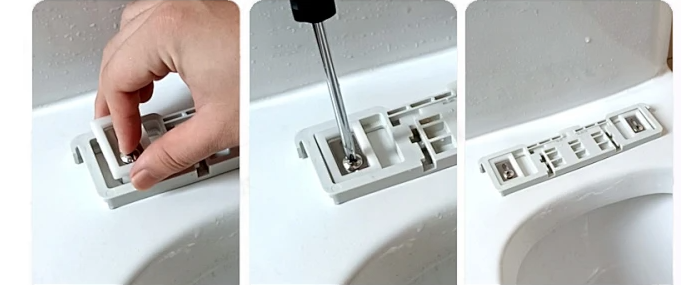
Start by removing the existing toilet seat. Locate the bolts at the back of the bowl securing the seat. Use a screwdriver or adjustable wrench to loosen and remove the nuts on these bolts. Lift the old seat carefully and remove it from the bowl.
Remove the old toilet seat
Step 3: Clean the Area
Take this opportunity to clean the toilet bowl and the surrounding area. Wipe away any accumulated grime or residue to create a clean surface for the new seat.
Step 4: Choose the Right Toilet Seat
Measure the distance between the bolt holes at the back of the bowl to determine the correct size for your new seat. Standard sizes are usually around 5.5 inches apart, but it’s crucial to double-check and ensure a proper fit.
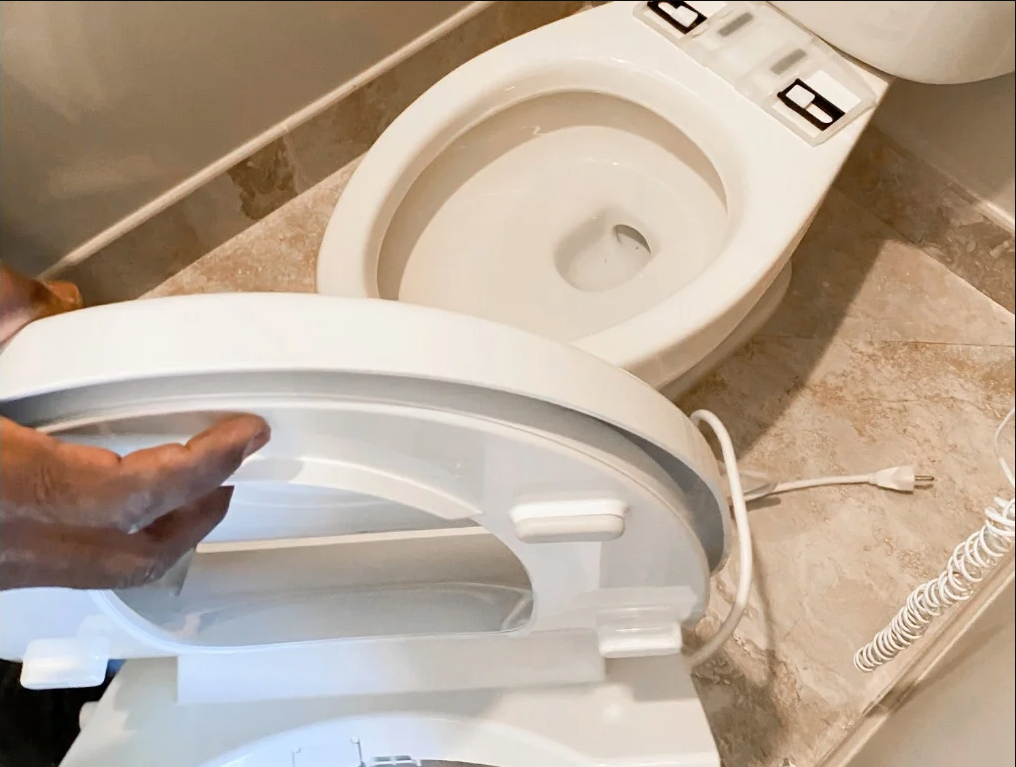
Step 5: Position the New Seat
Place the new toilet seat onto the bowl, ensuring that the bolt holes align with the holes in the toilet. Center the seat and make sure it is straight on the bowl before proceeding.
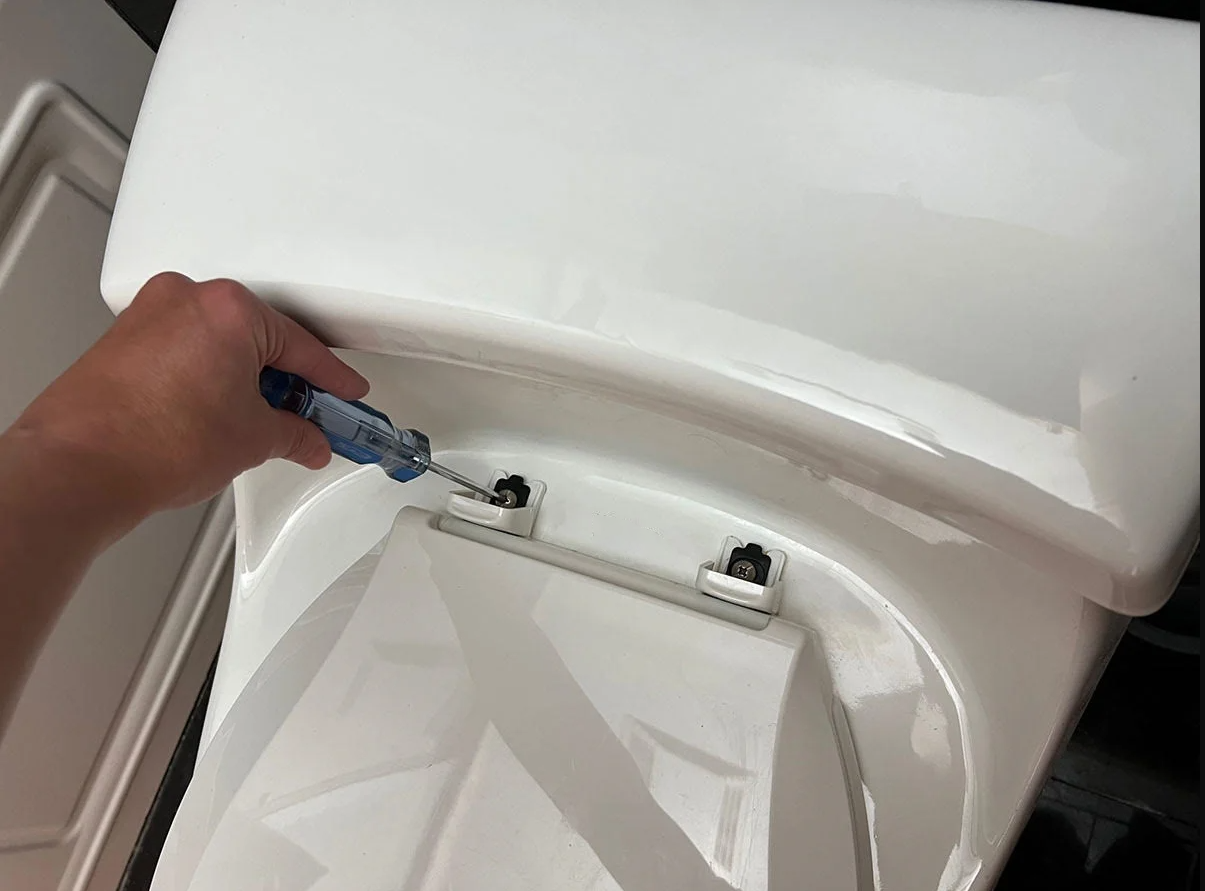
Step 6: Insert the Bolts
Insert the bolts through the holes in the toilet bowl and the corresponding holes in the new seat. Hand-tighten the nuts onto the bolts from underneath the bowl.
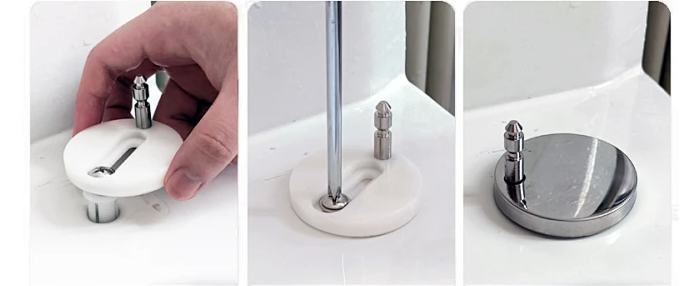
Quick release mounting
Step 7: Secure the Seat
Using a screwdriver and an adjustable wrench, tighten the nuts securely onto the bolts. Exercise caution not to overtighten, as this may cause damage to the porcelain.
Step 8: Check for Stability
Once the seat is securely attached, gently test its stability. If you notice any wobbling, adjust the position and tighten the nuts further until the seat is firmly in place.
Step 9: Optional – Use a Screwdriver for Tight Spaces
In some instances, the space between the bowl and the nuts may be tight. If needed, use a screwdriver to tighten the nuts as much as possible, and then use pliers to provide an extra turn for added security.
Step 10: Test the Lid and Seat
Before considering the installation complete, test both the lid and the seat. Ensure they can be lifted and lowered easily without any resistance. Check for proper alignment and functionality.
Final Tips:
Regularly check the tightness of the nuts to ensure the seat remains secure over time.
Dispose of the old seat responsibly, following local waste disposal regulations.
Consider donating the old seat if it’s in good condition.
By following these ten simple steps, you can successfully install a toilet seat and enhance the comfort and aesthetics of your bathroom. This DIY project requires minimal time and effort but can make a significant difference in your daily routine. Enjoy the satisfaction of completing a home improvement task on your own while ensuring a functional and stable toilet seat for years to come.
FAQ:
Q: Is it easy to replace the toilet seat?
If you’re wondering how to install a toilet seat, rest assured that replacing a toilet seat is one of the easier DIY tasks you can take on. Many newer toilet seats are secured with plastic hand-tightening bolts that will not corrode and require no more than a large screwdriver to install.
Q: How often does a toilet seat need to be replaced?
If you don’t run into stubborn nuts and bolts, toilet seat installation should take no more than 15 minutes to complete.
Q: When should I replace my toilet seat?
While toilet seats don’t have a shelf life, it’s a good idea to replace your toilet seat if it has cracks or stains, the bolts are severely corroded, or is worn so much that the toilet easily moves from left to right. Sit back on it.
Q: How do I fix a loose toilet seat?
To repair a loose toilet seat, start by removing the plastic cover covering the bolts. (You may need a small screwdriver to do this.) If the bolt has slots, simply tighten it with a large slotted screwdriver. If the bolt rotates without tightening, you may need to use pliers or a socket wrench with a deep socket to grip the nut underneath. Make sure to tighten each side evenly to prevent the seat from rocking.